Spring Landscaping Projects – A Comprehensive Guide

Spring Landscaping Projects – A Comprehensive Guide

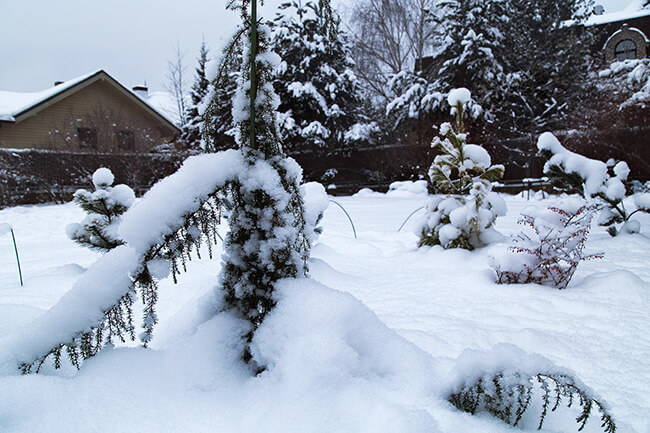
By late winter, most of us are champing at the bit to say goodbye to snow and begin some spring landscaping projects. However, when you’re located in regions with colder climates, like Hardiness Zones 5 and 6, timing is key to ensure your landscaping projects are successful and won’t be ruined by lingering, sub-zero temperatures.

In these zones, getting a head start on your landscaping project can be a bit tricky. But the below guide can help you kick off your landscaping tasks at the right times (earlier than you might think) and make the most of the spring and summer months.

Understanding The Southwestern Ontario Hardiness Zones

Southwestern Ontario hardiness zones 5 and 6Before diving into specifics, it’s important to define our hardiness zones (5 & 6). Hardiness zones are determined by the average minimum temperatures that a region experiences during the winter.

  • Zone 5 typically includes areas with average low temperatures ranging from –29°C to -23°C.
  • Zone 6 has slightly milder winters, with average low temperatures ranging from -23°C to -18°C.

These zones are significant because they dictate what types of plants and trees will thrive (i.e. survive winter) in our area, and they also impact the timing of landscaping projects. In both zones 5 and 6, the winter frost can last into late April (or even May!), so it’s crucial to be mindful of this when planning.

The Ideal Time to Start Spring Landscaping Projects in Southwestern Ontario

Though the ground may still be thawing in early spring, there are several tasks you can begin before the frost has fully left the ground.

Early Spring (Late March to Mid April): Planning, Preparation, and Soil Work

Early Spring Planting soil testing landscaping projectsWhile it’s not yet time to plant anything delicate or frost-sensitive, early spring is the perfect time to begin planning your landscaping project and preparing your yard. Here are some activities you can start with:

  • Planning and Design: Take advantage of the cold weather to sketch your landscaping design. This is the time to think about your overall vision, the layout of flower beds, garden paths, patios, or water features. You can also research which plants are best suited for your zone. Drawing your plan on paper (or using a landscaping app) will help you visualize the changes and ensure your project flows smoothly once the weather warms up.
  • Clearing the Area: Once the snow has melted and the ground has thawed enough, it’s time to begin spring cleanup. This can involve removing dead plants, leaves, and debris from flower beds, lawn areas, and other sections of your landscape. It’s also an ideal time to prune any shrubs or trees before they start budding. Be sure to clean up garden beds, pathways, and any other areas that need tidying up.
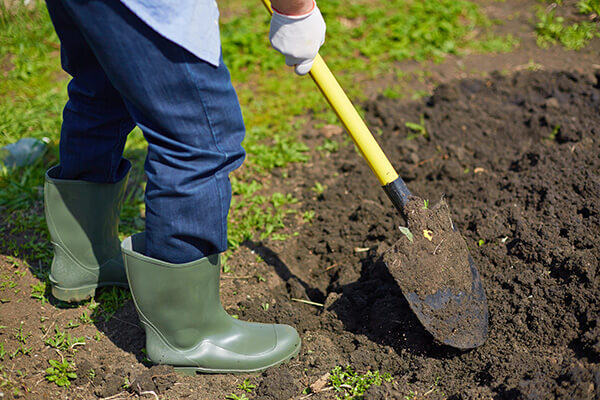
  • Soil Testing and Preparation: Testing the pH and nutrient levels of your soil early in the season is an essential step in preparing for a successful landscaping project. You can get a soil test kit from your local garden center or university extension service. Based on the results, you can amend the soil with the necessary fertilizers, compost, or lime to improve soil health. Early spring gives you enough time to make adjustments before planting begins.
  • Hardscaping: If your landscaping project includes hardscaping features like building a patio, retaining walls, or installing pathways, you can begin these tasks even in early spring. While it might still be too early to lay sod or plant anything sensitive, hardscaping typically involves working with materials like stone, gravel, or concrete that can be installed even if the ground is still a little cold. Just ensure that all of the frost is out of the ground. If it’s not, your hardscaping elements will settle after the ground thaws and you’ll most likely need to relay the stone. You can also lay out the framework for fences or garden structures.

Late Spring (Late April to Mid May): Planting and Plant Care

mid to late spring planting hardy perennials landscaping projectsAs the soil warms up and the last frost date approaches (typically in late April for Zone 6 and mid May for Zone 5), you can start thinking about planting. However, it’s important to wait until the soil is no longer too cold for seeds or young plants to thrive.

  • Planting Hardy Perennials: In early spring, certain plants, particularly cold-tolerant perennials, can be planted in Zones 5 and 6. These include species like hostas, lavender, daylilies, and coneflowers. These hardy perennials can withstand some frost and can be planted as soon as the soil is workable and temperatures have warmed a bit.
  • Starting Annuals Indoors: Many gardeners in Zones 5-6 choose to start annuals indoors earlier in the year, generally around 6-8 weeks before the last expected frost date. Flowers like marigolds, zinnias, and petunias, as well as vegetables like tomatoes, peppers, and herbs, all thrive when started inside in early spring. By doing this, you’ll have strong, healthy plants ready to be hardened off and planted outdoors when the time is right.
  • Mulching and Weed Control: As the weather warms and plants begin to emerge from the soil, applying a layer of mulch around your garden beds can help suppress weeds, retain moisture, and regulate soil temperature. Keep an eye out for any invasive weeds that may start sprouting and remove them before they have a chance to spread.

Late Spring to Early Summer (Late May to June): Full Planting and Maintenance

late spring to early summer planting spring landscaping projects trees and shrubsOnce the danger of frost has passed and soil temperatures are consistently above 50°F, you can move forward with your full landscaping project. This is when most of the planting will take place. This period offers a long window for planting flowers, shrubs, trees, and vegetables. Here’s what you can do:

  • Planting Warm-Weather Crops and Annuals: After the last frost date (typically mid-May for Zone 5 and late May to early June for Zone 6), you can begin planting annuals and vegetable garden crops that need warm soil to thrive.
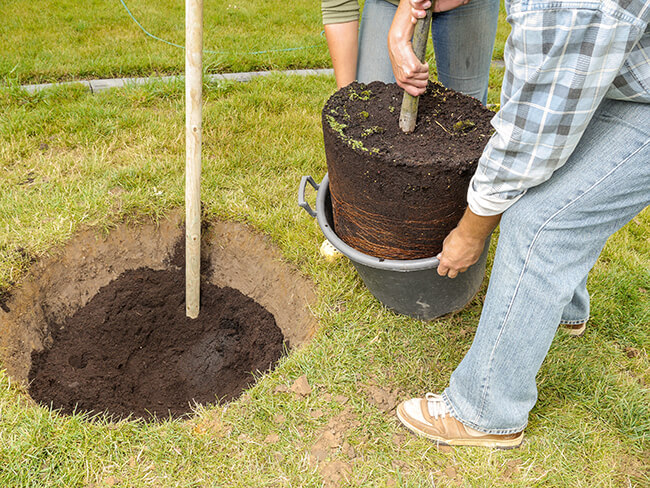
  • Adding Trees and Shrubs: Late spring is an excellent time to plant trees and shrubs, as the weather is warming and the soil is beginning to support healthy root development. When selecting trees or shrubs, make sure to choose species that are hardy in your specific zone. This will ensure that they can withstand the climate and provide long-term beauty.
  • Ongoing Maintenance: As your plants start to grow, make sure to monitor their progress. Water regularly, especially during hot spells, and watch for any signs of pests or diseases. Keeping your yard free of debris, properly mulching garden beds, and maintaining your hardscaping features will ensure your landscaping project looks great throughout the season.

In Hardiness Zones 5 and 6, it’s crucial to know the optimal time for each phase of your landscaping project to get the best results. While you may have to wait for the last frost date and ensure the soil is warm enough, there are plenty of activities you can start in early spring, including planning, clearing, hardscaping, and soil preparation.

By taking advantage of the early part of the year for these preparatory tasks, you’ll be ready to plant and grow a beautiful landscape once the warmer weather arrives. Remember to tailor your landscaping plans to your specific zone’s growing season and weather patterns, and don’t forget the importance of patience—good things take time, and a little advance preparation will pay off in the end.

If you’re not a green thumb, or just want to ensure that everything is done right and at the right time, contact us and share your landscaping goals.
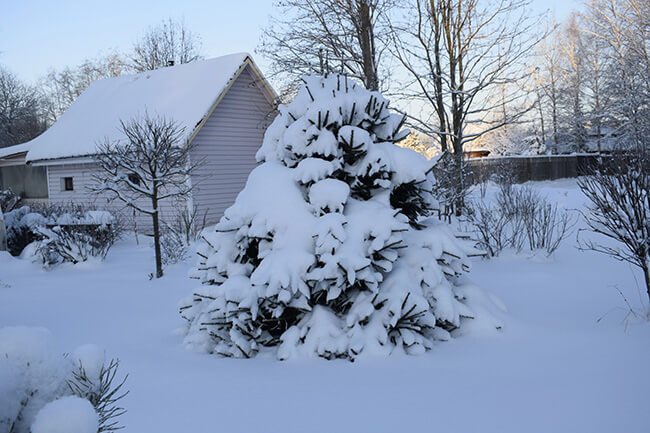
Should I Remove Snow from Trees and Shrubs?

Should I Remove Snow from Trees and Shrubs?

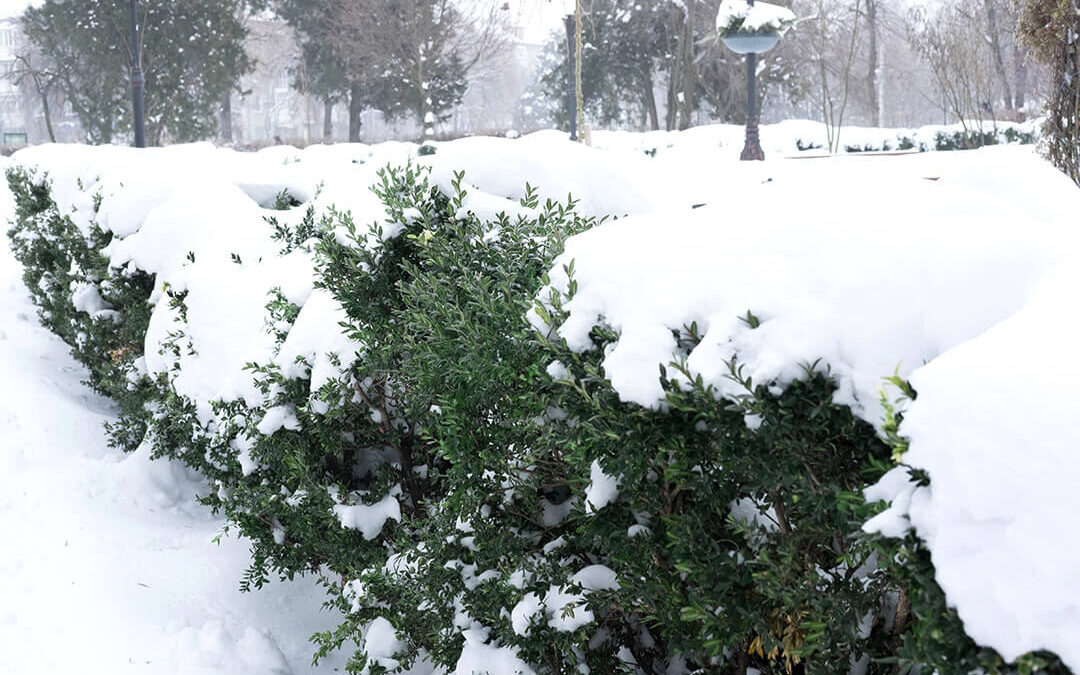
Winter can be tough on trees and shrubs, especially when heavy snow and ice accumulate. While snow can provide some insulation against freezing temperatures, too much weight can lead to broken branches, bent shrubs, and even long-term damage to your landscape. Knowing when to remove snow from trees and shrubs, how to protect your plants, and how to assess winter damage can help you keep your trees and shrubs healthy all season long.

Proactive Ways to Protect Trees and Shrubs from Winter Damage

heavy snow on evergreens protect trees from snow damageChoose the Right Plants

Planting trees and shrubs suited to your climate is the first step to reducing winter damage. Native species or those hardy to your zone are better equipped to handle the weight of snow and ice.

Use Burlap or Protective Wraps

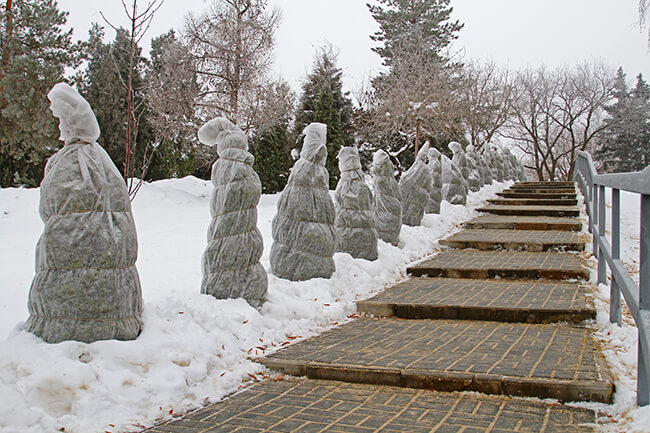
For smaller trees and delicate shrubs, wrapping them in burlap or protective fabric can shield branches from snow, wind, and ice buildup. This is especially useful for evergreens, which hold onto snow more than deciduous trees.

Install Supports for Vulnerable Branches

Multi-stemmed shrubs, like arborvitae or junipers, often splay open under heavy snow. Use stakes or twine to gently tie stems together before the first snowstorm to help them withstand the extra weight.

Avoid Salt Damage

Salt used to melt ice on driveways and sidewalks can damage nearby trees and shrubs. Use sand or calcium chloride instead, and keep de-icing chemicals away from your landscape.

Mulch Around the Base

Apply a layer of mulch (about 2-4 inches thick) around the base of trees and shrubs to help insulate roots and retain moisture during winter freezes and thaws.

When (and How) to Remove Snow or Ice

heavy snow on evergreens protect shrubs from snow damageNot all snow or ice needs to be removed. In some cases, it’s better to leave it alone to avoid causing more harm than good.
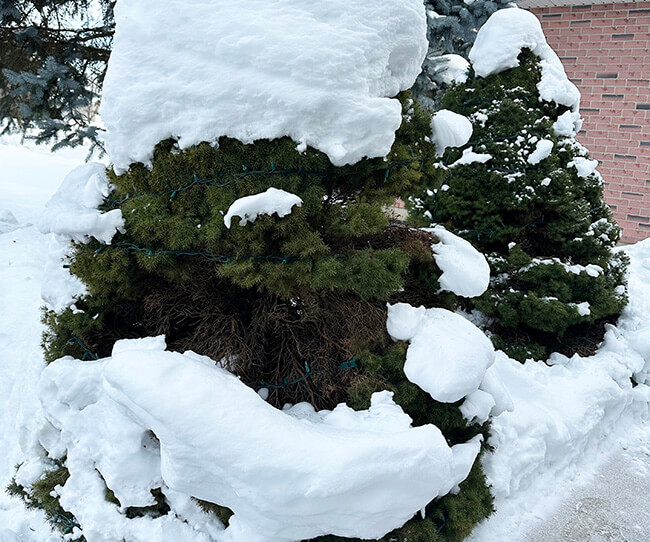
When to Remove Snow

  • If branches are bending dangerously under the weight of snow, it’s time to remove snow from trees and shrubs.
  • When snow accumulation is particularly heavy and is causing obvious strain on shrubs or trees.
  • For smaller shrubs that may be completely buried under a heavy snowfall.

How to Safely Remove Snow:

  • Use a broom or soft brush to GENTLY sweep snow off branches. Start from the bottom and work your way up to avoid adding extra weight to lower limbs.
  • Avoid using shovels or sharp tools that can damage bark and branches.
  • Never shake snow-covered branches, as this can cause them to snap, especially when frozen.

When NOT to Remove Snow

  • If the snow is light and fluffy, it generally won’t cause harm and can be left alone.
  • If branches are encased in ice, do not attempt to break or remove it. The ice protects the tree temporarily, and attempting to remove it could result in snapped branches or stripped bark.

How to Check for Damage After a Storm

Once the snow and ice have melted or settled, inspect your trees and shrubs for signs of damage: 

Look for Broken Branches

Check for cracked, split, or broken limbs that may need pruning.

remove snow from trees and shrubs landscaping guide how-to protect trees from damageExamine the Shape of Shrubs

Some shrubs may remain misshapen after being weighed down by snow. Give them time to bounce back before making adjustments.

Inspect Trunk and Bark Damage

Deep cracks or peeling bark may signal significant stress.

Pruning Tip

Remove broken or damaged branches promptly with clean, sharp pruning tools. Make cuts just outside the branch collar to help the plant heal properly.

When It Might Be Necessary to Replace a Tree or Shrub

Sometimes, despite your best efforts, a tree or shrub may suffer irreparable damage. Here are signs it may be time to replace it:

Severe Structural Damage

If more than 50% of a tree’s branches are broken or the trunk is split, the tree may not recover.

Permanent Leaning

If a tree or shrub has been pushed significantly out of position, its root system may be compromised.

Continued Poor Health

If a tree or shrub fails to leaf out in spring or shows signs of decline like dieback or stunted growth, it may not recover.

When replacing a damaged tree or shrub, consider selecting a hardier variety better suited to your winter conditions.

Protecting trees and shrubs during winter starts with preparation, but knowing when and how to remove snow can make all the difference. By being proactive and carefully assessing any damage, you can help your landscape survive the season and thrive come spring. If you’re ever unsure whether a tree or shrub is salvageable, consider consulting an arborist or landscaping professional for advice.

With the right care, your winter landscape can remain healthy, beautiful, and resilient year after year!

Fall Cleanup – Wrapping Trees

Fall Cleanup – Wrapping Trees

Getting Your Trees & Shrubs Ready for Winter

Newly planted evergreens should be wrapped with burlap during their first winter to protect them from Ontario’s cold, drying winds. Established plants generally don’t need annual wrapping unless they’re in an exposed location or subject to heavy snow load. Leave burlap in place until at least mid-April. Removing it too early during a mild stretch is one of the most common mistakes homeowners make.

If you’ve ever watched a once-healthy evergreen turn brown over winter, drying winds are usually to blame. Cold air moving across exposed needles pulls out moisture that the plant can’t replace when the ground is frozen, and the result in spring is the kind of browning that doesn’t recover. The good news is that a bit of burlap and some twine, properly applied before the cold sets in, prevents most of it.

Here’s exactly how we approach wrapping and tying trees and shrubs for winter at A Touch of Dutch Landscaping, after years of preparing gardens across Stratford, St. Marys, and Perth County for the season ahead.

Does every evergreen need to be wrapped?

Not necessarily, and wrapping unnecessarily adds work without benefit. As a general rule, we wrap evergreens during their first winter after planting, and generally don’t wrap them after that.

The reason the first year matters so much is that many of the evergreens sold at Ontario garden centres are grown on the west coast of Canada or the United States, where winters are considerably milder. When those plants arrive here, they haven’t yet adjusted to the harsher conditions of Southwestern Ontario, particularly the cold, drying east and west winds that we get through January and February. A young spruce or cedar planted in the open is especially vulnerable during that first winter before it’s had a chance to settle in and harden off to local conditions.

After the first growing season, healthy established evergreens typically handle Ontario winters without help. The exception is plants in particularly exposed or windy locations, or larger cedars and yews that grow under a roofline where snow load can become a problem.

What you’ll need

The materials are simple and inexpensive:

  • Heavy burlap – heavier weight holds up better through wind and wet than lightweight fabric. Available at most garden centres, hardware stores, and co-op stores in the area.
  • Garden twine or string – for tying burlap around individual plants and for tying branches on larger shrubs.
  • Wooden stakes – needed if you’re protecting a cedar hedge or a long row of shrubs.
  • Staple gun – useful for attaching burlap to stakes on a hedge.

How to wrap small evergreens

For a small plant – a young spruce, a newly planted cedar, or a compact boxwood – the process is straightforward. Cut a piece of burlap large enough to drape over the entire plant with some overlap at the base. Hang it over the top so all sides are covered, then tie it securely at the bottom with twine. That’s really all there is to it. The goal is to block the wind from reaching the foliage on all sides. The plant doesn’t need to be sealed completely, just shielded.

How to wrap taller evergreens

Once plants get to five, six, or seven feet tall, a single drape of burlap may not be practical. You have two good options:

Wrap horizontally. Starting from the bottom, wrap the burlap around the plant in overlapping horizontal layers, working your way up. Tie it off as you go to hold it in place.

Drape and tie multiple pieces. For wider plants, drape two or more pieces of burlap over the top from different angles, then tie them together where they overlap.

If the plant already has a support stake in the ground – which many newly planted trees do – use it to your advantage. You can anchor and tie the burlap to the stake, which makes the whole process faster and more secure.

Whichever method you use, the goal is the same: make sure all sides of the plant are protected from wind and blowing snow, with no large gaps where cold air can funnel in.

How to protect a cedar hedge

Wrapping each plant individually in a long cedar hedge of ten, fifteen, or twenty plants is impractical. Instead, we build a simple burlap screen along the outside of the hedge.

Drive wooden stakes into the ground about four feet apart along the length of the hedge. Attach burlap to the stakes (a staple gun makes this fast) and run it along the full length. You don’t need to enclose the top; as long as the burlap reaches at least as high as the cedars, it will block the wind adequately. Keep stakes no more than four feet apart. Further than that and the burlap will sag or catch too much wind and pull free.

Once it’s up, leave it for the season. It requires no maintenance through the winter.

Tying larger cedars and yews to prevent snow damage

For larger, established cedars and yews, particularly ones growing close to a building where they’re likely to catch snow sliding off the roofline, burlap wrapping isn’t always the right solution. Instead, we tie the branches together with twine to keep heavy snow from splitting the plant open or bending branches permanently out of shape.

Start at the base of the plant, tie the twine onto a lower branch, and then spiral it upward around the plant, gently gathering the branches as you go, until you reach near the top. Keep it snug enough to hold the shape, but not so tight that you’re compressing the branches hard against each other. You want some airflow to continue moving through the plant. This technique works particularly well for columnar cedars, arborvitae, and upright yews.

When to take the burlap off in spring

This is where a lot of homeowners undo all their fall work, taking the burlap off too early.

It’s tempting on a warm day in late February or early March, when it genuinely feels like spring has arrived. But in Ontario, cold winds can return well into the end of March, and those winds are just as capable of browning out needles as anything that came earlier in winter. If the burlap comes off too soon, all the protection it provided becomes irrelevant.

Our rule: leave burlap on until at least mid-April. The twine used to tie branches can generally come off a bit earlier – significant snowfall is unlikely after the first of April – but the burlap wrapping on the foliage itself should stay in place until the worst of the wind risk has genuinely passed.

That said, don’t leave it on too long either. Once plants start pushing new growth in spring, having burlap restricting that growth does more harm than good. Mid-April is usually the right window – late enough to be safe, early enough to let the plant breathe and grow.

Step-by-step summary

  • Wrap newly planted evergreens in their first winter. Established plants generally don’t need it
  • Use heavy burlap for better durability through wind and wet weather
  • Small plants: drape and tie at the base
  • Taller plants: wrap horizontally in layers, or drape multiple pieces and tie together
  • Cedar hedges: stake-and-burlap screen along the outside, stakes four feet apart
  • Large cedars and yews near rooflines: tie branches with twine from bottom to top
  • Leave burlap in place until mid-April, but remove twine after April 1
  • Remove all protection before active spring growth begins

Frequently asked questions

Do evergreens need to be wrapped every winter in Ontario?

No. Established evergreens generally do not need to be wrapped every winter. Wrapping is most important during the first year after planting, when the plant is still acclimatizing to local wind exposure and climate conditions. After the first growing season, healthy established evergreens typically don’t require burlap protection unless they are in a particularly exposed location.

Why do newly planted evergreens need winter wrapping?

Many evergreens sold in Ontario are grown on the west coast of Canada or the United States, where winters are significantly milder. When transplanted to Southwestern Ontario, they haven’t yet adjusted to local winter conditions, particularly the cold, drying winds that can pull moisture from the needles and cause browning. Wrapping during the first winter protects the plant while it adjusts to its new environment.

How do you wrap a cedar hedge for winter in Ontario?

For a cedar hedge, drive wooden stakes into the ground approximately four feet apart along the outside of the hedge. Attach burlap to the stakes along the full length and staple it in place. The top doesn’t need to be enclosed. Just make sure the burlap reaches at least as high as the cedars. Keep stakes no more than four feet apart to prevent the burlap from sagging or blowing loose.

When should you remove burlap from trees and shrubs in spring?

Leave burlap on until at least mid-April in Ontario. Cold winds can return through late March and cause the same needle browning the burlap was protecting against. Twine used for tying branches can generally come off after April 1. Remove all protection before plants begin actively growing to avoid restricting new growth.

What kind of burlap should I use to wrap trees for winter?

Use a heavier-weight burlap. It holds up better through wind and wet weather than lightweight fabric. Heavy burlap is available at most garden centres, co-op stores, and hardware stores in Ontario.

Should you wrap boxwoods and yews for winter in Ontario?

Yes, boxwoods and yews benefit from winter protection, particularly in their first few years or if planted in exposed locations. Drape burlap over the plant and tie it at the base. This protects foliage from drying winter winds without completely restricting airflow.

Questions about getting your garden ready for winter?
A Touch of Dutch Landscaping provides fall garden cleanup, winterizing, and plant protection services in Stratford, St. Marys, Mitchell, Shakespeare, and across Perth County.
Get in touch →

A Touch of Dutch Landscaping · Stratford, Ontario
Serving Stratford, St. Marys, Mitchell, Shakespeare, and Perth County, Ontario.

Fall Lawn Cleanup

Fall Lawn Cleanup

Fall Lawn Care Tips: Leaf Cleanup and Proper Mowing Height

As autumn settles in and the leaves begin to fall, your lawn needs a little extra attention to stay healthy through winter and into next spring. While it can be tempting to let fallen leaves pile up or skip the last mow of the season, proper fall lawn care plays a big role in keeping your grass lush and vibrant year after year.

Check out this video where Johan covers the key elements of cleaning up your gardens in the fall and preparing them for the winter.

Here’s what to keep in mind when managing leaves and mowing your lawn this fall.

Should You Mulch or Rake Leaves?

When leaves are dry and crisp—as they often are in early to mid-October—mulching can be an excellent option. Running a mulching mower over a light layer of leaves helps return valuable organic matter to the soil. Just be sure to mulch regularly rather than waiting until all the leaves have fallen. Trying to mulch a thick, wet layer of leaves later in the season can clog your mower and smother your grass.

If the leaves become soggy after rain or you’ve fallen behind on cleanup, it’s best to rake or use a bagging mower to remove them. Collected leaves can be added to your compost pile and, once broken down, used to enrich your flower beds the following year. This simple cycle helps you create natural fertilizer while keeping your property looking tidy.

When and Why Leaf Cleanup Matters

Beyond appearances, removing leaves is important for your lawn’s health. Wet, matted leaves can block sunlight and airflow, encouraging mold and fungus to develop. In particular, if you notice black spots on your leaves—a common sign of fungal infection—it’s best not to compost them. These infected leaves can reintroduce disease to your trees and shrubs next year. Instead, bag them and take them to your local yard waste depot or landfill.

Even if you miss your window before the first snowfall, it’s still worth cleaning up leaves once the snow melts again. A quick mid-winter cleanup helps prevent mold and keeps your grass from suffocating under layers of decaying leaves.

How Short to Cut Your Lawn in the Fall

Most lawns in Ontario can be cut until late October, depending on weather conditions. Throughout the growing season, aim to maintain a mowing height of about 3 to 3½ inches. For the final one or two cuts of the year, gradually lower the blade to about 2 to 2½ inches.

Keeping your grass a little shorter before winter prevents it from folding over under snow, which can create damp conditions ideal for mice and other small rodents to nest. It also helps improve air circulation around the crown of the grass, reducing the risk of disease and snow mold.

A Simple Fall Lawn Care Checklist

  • ✅ Mulch light layers of dry leaves regularly, or rake and compost thicker layers
  • 🚫 Bag and dispose of any leaves with black spots or fungal growth
  • ✂️ Lower your mower height slightly for the final cuts of the season
  • 🧹 Keep lawns clear of debris before the first snowfall
  • 🌱 Compost healthy leaves for use in next year’s gardens and flower beds

Frequently Asked Questions About Fall Lawn Care in Ontario

Can I leave leaves on my lawn over winter?

Leaving a few mulched leaves is fine, but a thick layer can smother your grass and encourage mold growth. Always make sure leaves are dry and finely shredded if you plan to mulch them into your lawn.

When should I stop mowing my lawn in Ontario?

Most homeowners can stop mowing around the end of October, once grass growth slows due to cooler temperatures. If the weather stays mild, continue mowing as needed until the grass stops growing.

What’s the best height to cut grass before winter?

Aim for around 2 to 2½ inches for your final mow. Shorter grass helps prevent matting, reduces the risk of snow mold, and discourages mice and voles from nesting in your lawn.

Should I compost leaves with black spots or fungus?

No. Leaves with black spots are likely infected with fungus and can spread disease to your plants next year. These should be bagged and taken to a local composting facility or yard waste site instead.

Is it too late to clean up leaves after the first snow?

Not necessarily. If the snow melts and you can access your lawn again, removing leftover leaves can still make a difference. It improves airflow, prevents mold, and helps your lawn green up faster in spring.

Get Your Lawn Ready for Spring

By keeping up with leaf cleanup and adjusting your mowing height this fall, you’ll set your lawn up for a healthier, greener spring. If you’d like help with seasonal cleanup or lawn maintenance, the A Touch of Dutch Landscaping team in Stratford, Ontario, is here to help you make the most of your outdoor space—season after season.

Caring for Newly Planted Trees

Caring for Newly Planted Trees

Planting or transplanting a tree is a significant step towards enhancing your landscape, but the success of this endeavour largely depends on the care provided during the first few years. This comprehensive guide will help ensure your newly planted or transplanted tree thrives.

Watering Newly Planted Trees

  • Watering Newly Planted TreesInitial Watering: Immediately after planting or transplanting, water the tree thoroughly. This helps settle the soil and eliminate air pockets around the roots.
  • Establishing a Routine: For the first few weeks, water the tree every 2-3 days. Gradually reduce the frequency to once a week after the tree has started to establish itself (about 6-8 weeks).
  • Water Quantity: Ensure deep watering, which means the water should reach the tree’s root zone (about 12-18 inches deep). Depending on the size of the tree, 10-15 gallons of water per watering session may be needed.
  • Mulching: Apply a 2-4 inch layer of mulch around the base of the tree, keeping it a few inches away from the trunk. Mulch helps retain moisture and regulates soil temperature.

Fertilizing Newly Planted Trees

  • Protecting Newly Planted Trees from WindWhen to Fertilize: Avoid fertilizing immediately after planting. Wait until the tree shows signs of new growth, which indicates it has begun to establish its roots.
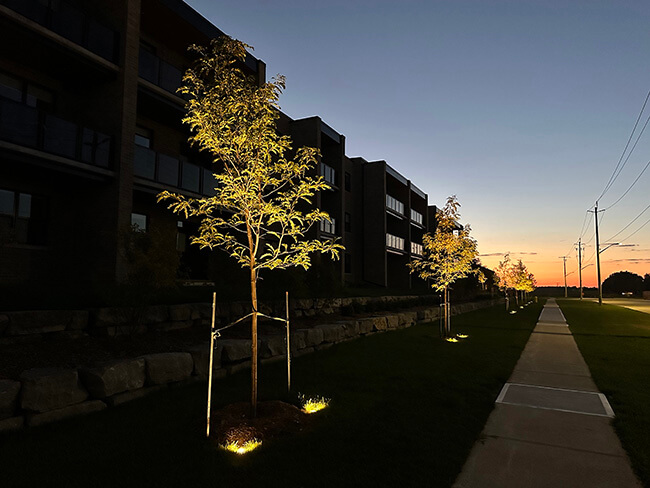
  • Type of Fertilizer: We prefer fertilizer spikes which are balanced and slow-release, and are inserted into the soil around the drip line, which eliminates risk of burning the grass surrounding the tree. Organic compost or well-decomposed manure can also be beneficial.
  • How to Apply: Stake about 4 fertilizer spikes, evenly spaced, in the soil under the tree canopy.

Protection from Wind

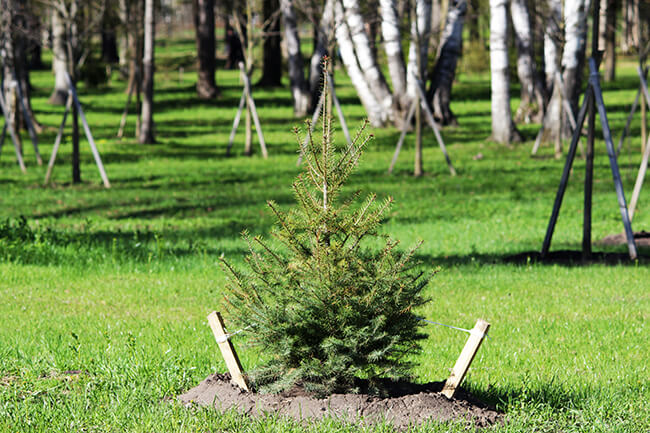
  • Staking Newly Planted Trees to protect from windStaking: Young trees may need to be staked to protect them from strong winds, especially in exposed areas. Use flexible tree ties that allow some movement, promoting a stronger trunk.
  • Placement of Stakes: Smaller trees typically only require one stake. Place stake outside the root ball, angled outward, on the side of prevailing winds and tie the tree loosely. If staking a larger tree, add a second stake opposite the first one. Remove stakes after one growing season to prevent girdling and to encourage independent growth.

Protection from Standing Water

While improving drainage by amending the soil and/or raising the planting site can improve the immediate area, it will not help the tree in the long run. Once the tree is established and the roots grow beyond the amended area, they’ll be exposed to the poor draining characteristics of the overall site. It’s best to avoid areas with poor drainage, and opt instead for spots with more tree-friendly soil conditions.

Protection from Frost and Snow

  • Protecting Newly Planted Trees from Frost and SnowFrost Protection: In areas prone to frost, new evergreens should be wrapped with burlap, but this is only necessary for their first winter. Young deciduous trees do not need to be wrapped unless they are not extremely hardy for your zone.
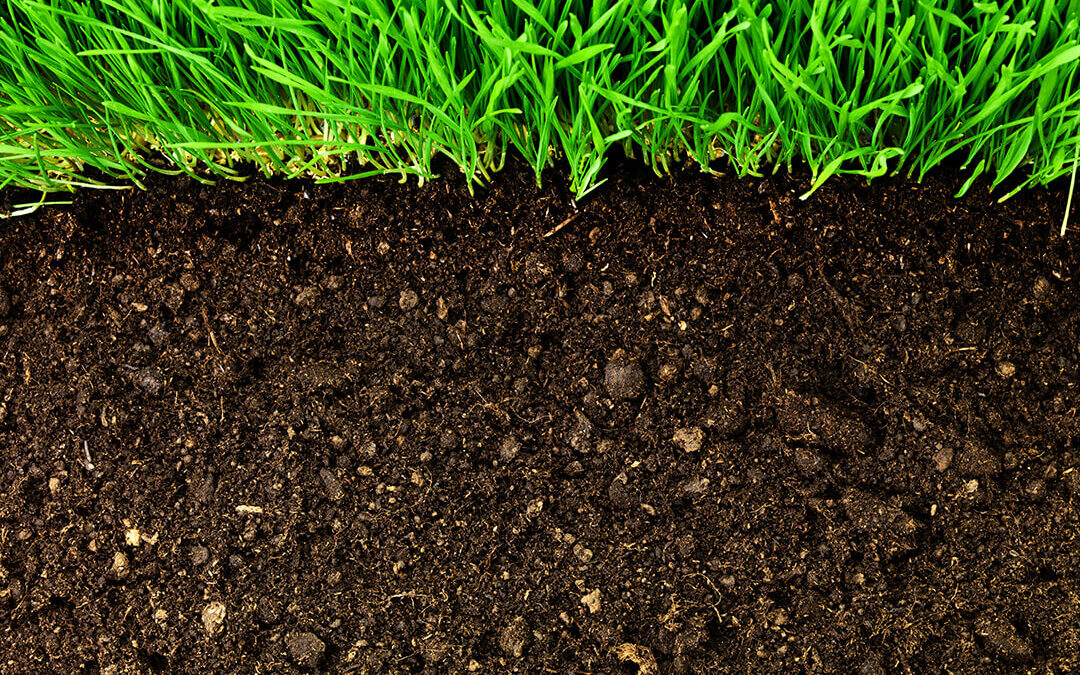
  • Mulching for Insulation: Mulch not only retains moisture but also insulates the roots from extreme cold. Apply mulch before the first hard freeze and replenish as needed throughout the winter.
  • Snow and Ice Removal: Gently brush off snow from the branches to prevent them from breaking. Avoid using salt-based deicers near trees, as salt can damage the roots and soil structure.

Monitoring and Maintenance

  • Regular Inspections: Check the tree regularly for signs of stress, such as wilting, discoloration, or pests. Address any issues promptly to prevent long-term damage.
  • Pruning: Prune any dead, damaged, or diseased branches to promote healthy growth. Avoid heavy pruning in the first year after planting to allow the tree to establish itself.
  • Pest and Disease Control: Monitor for pests and diseases, and treat as necessary. Organic and biological controls should be used according to the severity of the problem and the tree species. Chemical pest controls are not permitted for use in Ontario.

Caring for Newly Planted Trees Long Term

  • Ongoing Watering and Fertilization: Continue to water the tree during dry spells, even after it has become established. Fertilize annually, for the first five years. After that, roots are so deep that standard fertilization strategies will not impact the deep roots. If you do suspect that your tree requires fertilization, we recommend contacting a company that specializes in deep root fertilization.
  • Seasonal Adjustments: Adapt your care routine to seasonal changes. For example, reduce watering in the fall as the tree prepares for dormancy, and resume regular watering in the spring.

Proper care during the first few years of a tree’s life sets the foundation for a healthy, long-lasting addition to your landscape. By following these guidelines, you can ensure your tree grows strong and resilient, contributing to the beauty and health of your environment for years to come. If you’d prefer to have assistance with tree selection and planting, contact us.

Soil Types and Landscaping

Soil Types and Landscaping

Landscaping that not only is not only beautiful but healthy depends heavily on the quality of the soil that provides a landscape’s foundation. As in most places, Southwestern Ontario’s distinct regional climate and geological conditions shape the native soils. In this blog post, we will explore the connection between soil types and landscaping, delve into the characteristics of Southwestern Ontario soils, and discuss how homeowners can improve soil conditions in their own landscapes.

The Significance of Soil in Landscaping

Soil serves as the lifeblood of any garden, influencing plant health, growth, and overall ecosystem balance. Its physical, chemical, and biological properties contribute to water retention, nutrient availability, and microbial activity – all crucial factors for a flourishing landscape. Properly managed soil can enhance plant resilience, reduce erosion, and create a sustainable and visually appealing outdoor space.

Southwestern Ontario Soils

Amending soil for landscapingThe soils in Southwestern Ontario are diverse, shaped by various factors including climate, parent material, and topography. Common soil types include clay, loam, and sandy soils. Each soil type has unique characteristics that affect water retention, drainage, and nutrient availability.
Clay Soil

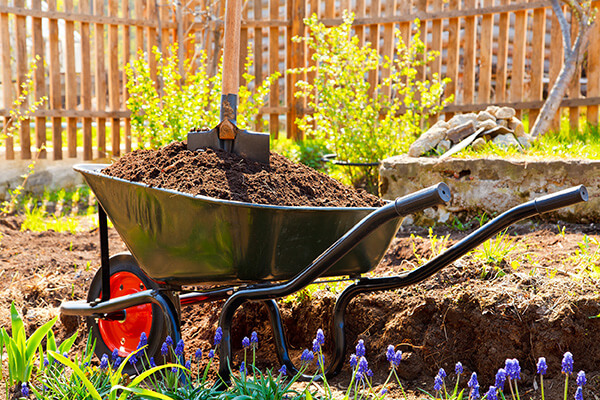
Clay soils are heavy and compacted, which allows them to retain water well. However, they can also result in poor drainage and aeration. To improve clay soil, adding organic matter such as compost can enhance its structure and drainage. Simply adding sand to dry soil can also improve drainage, as can adding garden lime. Clay soil comprises a significant proportion of the soils in our region.

Loam Soil

Loam soil is a well-balanced combination of sand, silt, and clay. It is ideal for gardening due to its excellent water retention and drainage properties. Regular addition of organic matter helps maintain its fertility.

Sandy Soil

Sandy soils consist of larger particles that drain quickly. However, they struggle to retain water and nutrients. Adding organic matter, such as compost or well-rotted manure, can improve water retention and fertility.

Best Plants for Different Soil Types

Soil types and qualitySelecting the appropriate plants for your soil type is crucial for a thriving landscape in Southwestern Ontario:
Clay Soil

  • Plants that tolerate wet conditions: Redtwig dogwood, summersweet, and cardinal flower
  • Drought-tolerant options: Russian sage, yarrow, and black-eyed Susan

Loam Soil

  • Versatile options: Daylilies, coneflowers, and ornamental grasses.
  • Shade-loving plants: Hostas, astilbes, and ferns.

Sandy Soil

  • Drought-tolerant plants: Lavender, sedum, and coreopsis.
  • Acid-loving plants: Azaleas, blueberries, and rhododendrons.

Even if you have soil that is unsuitable for a particular tree or plant you desire to include in your landscape, you don’t have to give up on the idea entirely. It will require some effort to amend the soil to adequately sustain the chosen specimen.

Amending Soil Conditions

soil types and landscapingHomeowners in Southwestern Ontario can proactively improve soil conditions to meet their landscaping needs. Here are some suggestions:

Adjusting Acidity

  • Test the soil pH using a home testing kit.
  • To increase acidity, incorporate organic matter like pine needles, peat moss, or sulfur.
  • To decrease acidity, introduce lime into the soil.

Improving Drainage

  • For clay soils, add organic matter, garden lime, or sand to enhance aeration and drainage.
  • For sandy soils, mix in compost to improve water retention.
  • Consider installing raised beds or French drains in poorly draining areas.

Homeowners in Southwestern Ontario can achieve a beautiful and sustainable outdoor space by understanding the unique characteristics of their soils and implementing thoughtful improvements. By selecting appropriate plants and maintaining healthy soil conditions, they can create a vibrant and resilient garden that enhances the beauty of their homes while positively contributing to the local ecosystem.