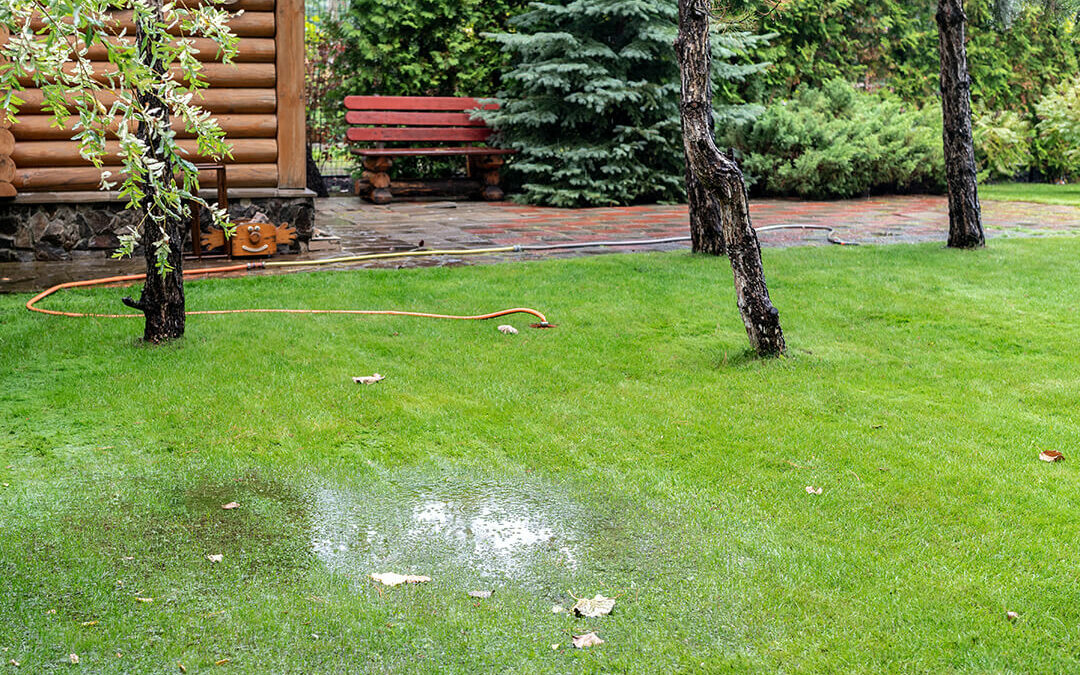
Seed or Sod – Which Is Best for Your Lawn?
Creating and maintaining a lush, green lawn is the goal of many homeowners. Because of the maintenance required to keep grass looking its best, some may opt to reduce total lawn area by adding hardscaping, softscaping, and xeriscaping. But, for those who love a verdant lawn, achieving it often comes down to a fundamental decision: seed or sod?
Both methods have their advantages and differences, and understanding them can help you make the best choice for your lawn. In this post, we’ll explore the pros and cons of seeding and sodding, as well as discuss the most suitable grass varieties for our region’s hardiness zones (5/6).
Seed or Sod – The Benefits of Grass Seed
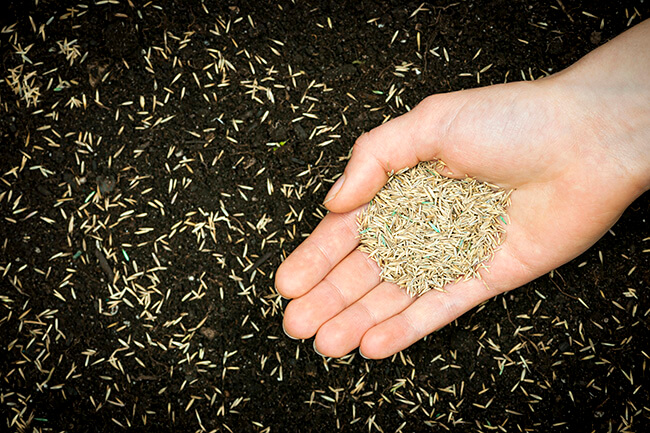 Seeding involves planting grass seed directly into the soil and allowing it to grow and establish over time. Here are some advantages of seeding:
Cost-Effectiveness
Seeding is generally more budget-friendly than sodding, making it an attractive option for those looking to save money.
Variety
Seeding allows for a wider selection of grass varieties, including blends tailored to specific soil types, sunlight levels, and climate conditions.
Adaptability
Seeded lawns tend to develop deeper root systems, which can make them more resilient to drought and environmental stress over time.
However, seeding also has its drawbacks. It typically takes longer for seeded lawns to establish, requiring regular watering and maintenance during the germination period. Additionally, there’s a risk of erosion or soil disturbance before the grass becomes fully established.
Seed or Sod – The Benefits of Sod
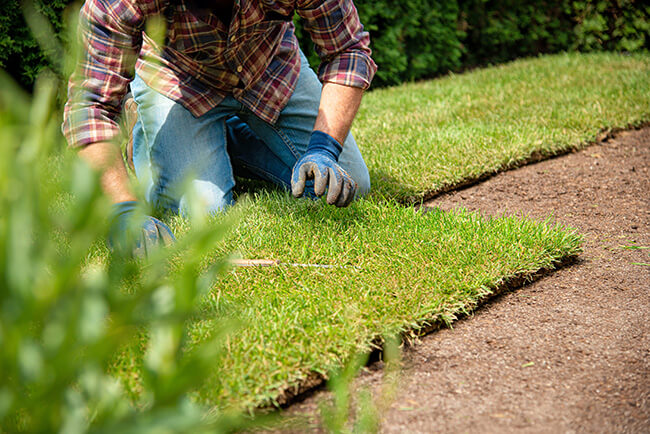 Sodding involves laying down pre-grown grass turf, complete with roots and soil, onto prepared soil. Here are some advantages of sodding:
Instant Results
Sodding provides an instant lawn, with immediate coverage and a mature appearance. This makes it a popular choice for homeowners who want immediate results or have limited time for lawn care.
Erosion Control
Sodding helps prevent soil erosion, making it an excellent choice for sloped or vulnerable areas of the landscape.
Weed Suppression
Sodding can help suppress weed growth, as the dense turf outcompetes many weed species.
However, sodding is generally more expensive than seeding, and the selection of grass varieties may be limited compared to seeding options. Additionally, improper installation or care can lead to issues such as uneven settling or root detachment.
Grass Varieties for Hardiness Zones 5 and 6
In hardiness zones 5 and 6, which encompass regions with cold winters and moderate summers, several grass varieties thrive. For seeding, popular options include:
Kentucky Bluegrass
Known for its fine texture and deep blue-green colour, Kentucky bluegrass is well-suited to cooler climates and is often included in seed blends for its durability and attractive appearance.
Perennial Ryegrass
Perennial ryegrass is quick to establish and offers excellent wear tolerance, making it suitable for high-traffic areas.
Fine Fescue
Fine fescue varieties, such as creeping red fescue or Chewings fescue, are shade-tolerant and low-maintenance options for areas with limited sunlight.
For sodding, blends of Kentucky bluegrass and fine fescue are commonly used due to their adaptability and resilience.
Both seeding and sodding offer distinct advantages for establishing a healthy lawn. Seeding is cost-effective and allows for a wider range of grass varieties, while sodding provides instant results and helps prevent soil erosion. Ultimately, the best choice depends on factors such as budget, time constraints, and personal preferences. By selecting the right method and grass varieties for your specific needs, you can enjoy a vibrant, beautiful lawn for years to come.

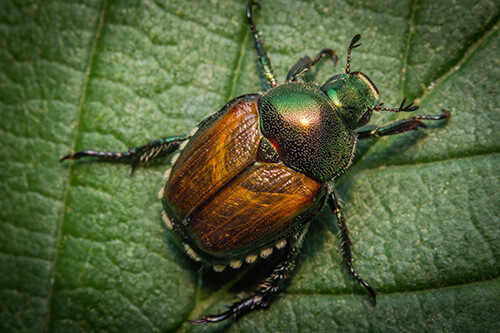 Japanese beetles were introduced from Japan in the early 20th century and have since made themselves at home in Southwestern Ontario. These beetles have a metallic green color with copper-colored wings and are often found munching on the leaves of roses, grapes, and fruit trees.
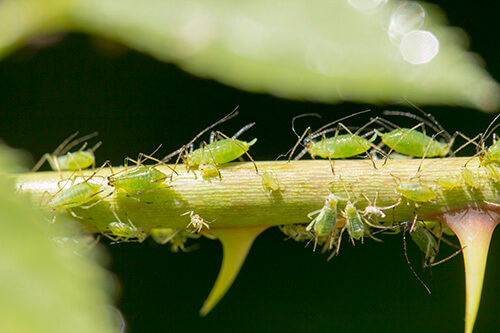 Aphids are native to North America and thrive in our temperate climate, reproducing rapidly and infesting a wide range of plants. This makes Aphids one of the most common among the common lawn and garden pests in our region. Look for clusters of small, green, pear-shaped insects on plant stems and new growth of various garden plants, including roses, vegetables, and fruit trees.
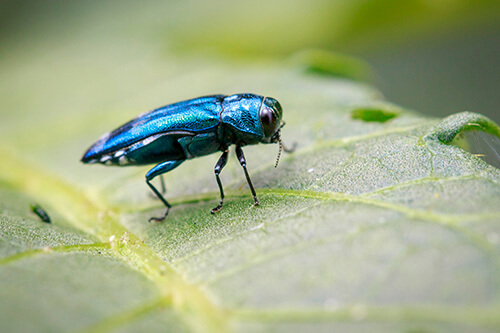 Native to Asia, emerald ash borers arrived in North America in the early 2000s and have devastated ash tree populations. Look for D-shaped exit holes in ash tree bark, canopy dieback, and S-shaped larval galleries under the bark.
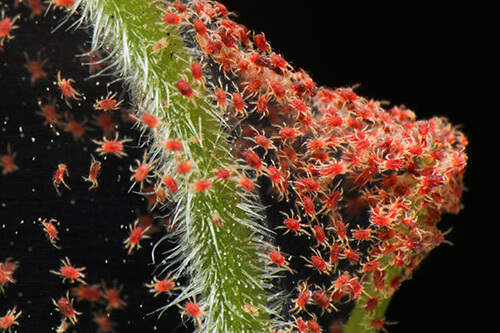 Spider mites are native to North America and thrive in warm, dry conditions, rapidly infesting plants. Look for fine webbing on the undersides of leaves and stippling or discoloration on foliage of garden plants, including tomatoes, beans, and ornamentals.
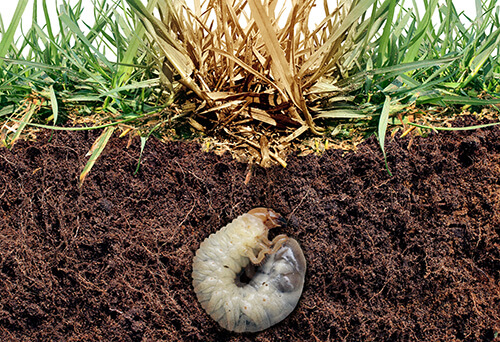 These soil-dwelling larvae are the immature stage of beetles like Japanese beetles, and they primarily feed on grass roots. Look for patches of dead or dying grass, which may indicate white grub infestation.
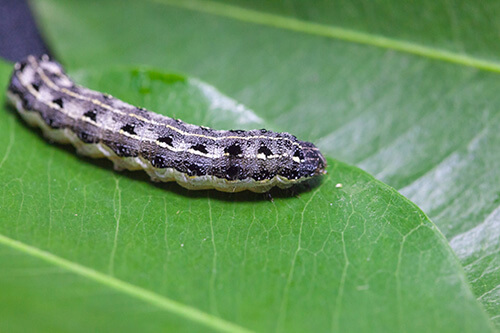 Cutworms are native to North America and are nocturnal pests that feed on young seedlings at or below ground level. Look for seedlings that have been cut off at the base.
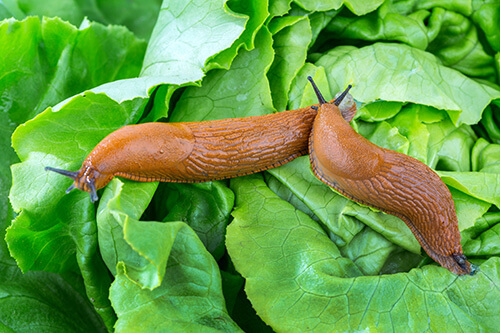 Slugs and snails are native to the region and are nocturnal pests that feed on plant foliage and tender shoots of a range of garden plants. Follow slime trails and look for irregular holes in leaves.
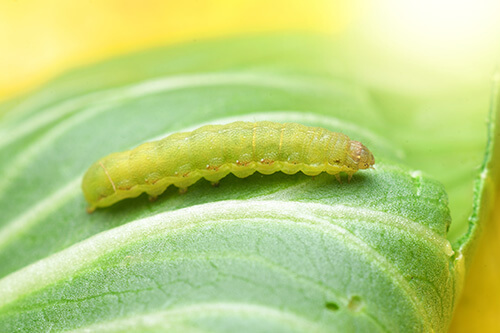 Cabbage worms are native to North America and are the larval stage of small white butterflies. As their name implies, they feed on brassica crops. Look for green caterpillars on cabbage family plants (cabbage, broccoli, kale), causing chewing damage to leaves.
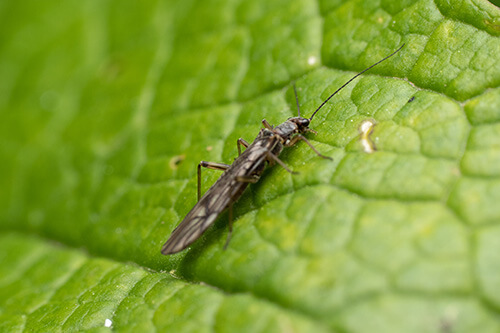 Thrips are native insects that feed on the sap of garden plants, including roses, onions, and peppers. They can transmit diseases to a wide range of plants. Look for tiny, slender insects and silvery patches on leaves.
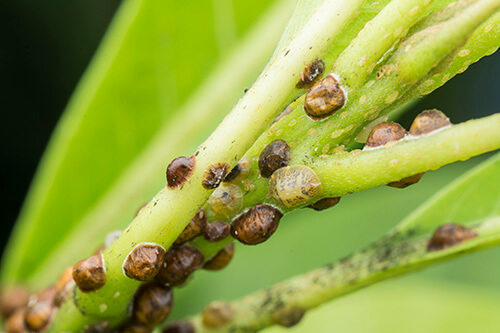 Scale insects are native to North America and can weaken or kill plants by feeding on sap and excreting honeydew of ornamental and fruit-bearing trees. Look for small, immobile insects on stems and leaves, often surrounded by a protective shell.
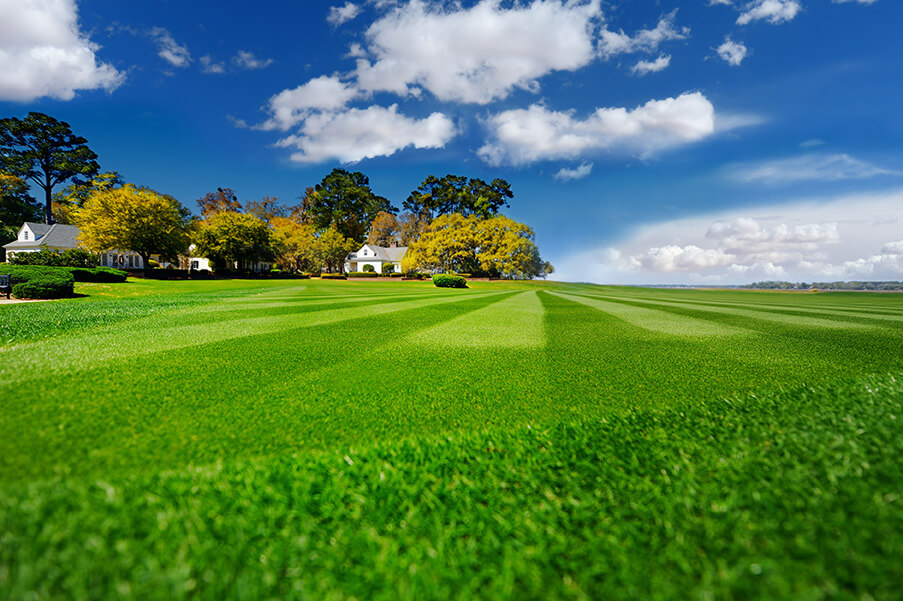
 Investing in quality lawn care equipment is essential to achieve professional results. A sturdy lawnmower with sharp blades is a must. Whether you prefer a traditional gas-powered mower or an eco-friendly electric one, make sure it suits the size and terrain of your lawn. Additionally, consider acquiring a string trimmer, also known as an edger, for detailing and reaching areas that the lawnmower can’t easily access.
 Dull mower blades tear the grass rather than cutting it cleanly. This can lead to a brownish, uneven appearance on the lawn’s surface. Regularly sharpen your lawnmower blades to ensure a precise and neat cut, enhancing the overall aesthetics of your lawn. A few times a year, you can use mulching blades on your mower. These blades will chop or cut the clippings in smaller pieces to make it easier for them to decompose.
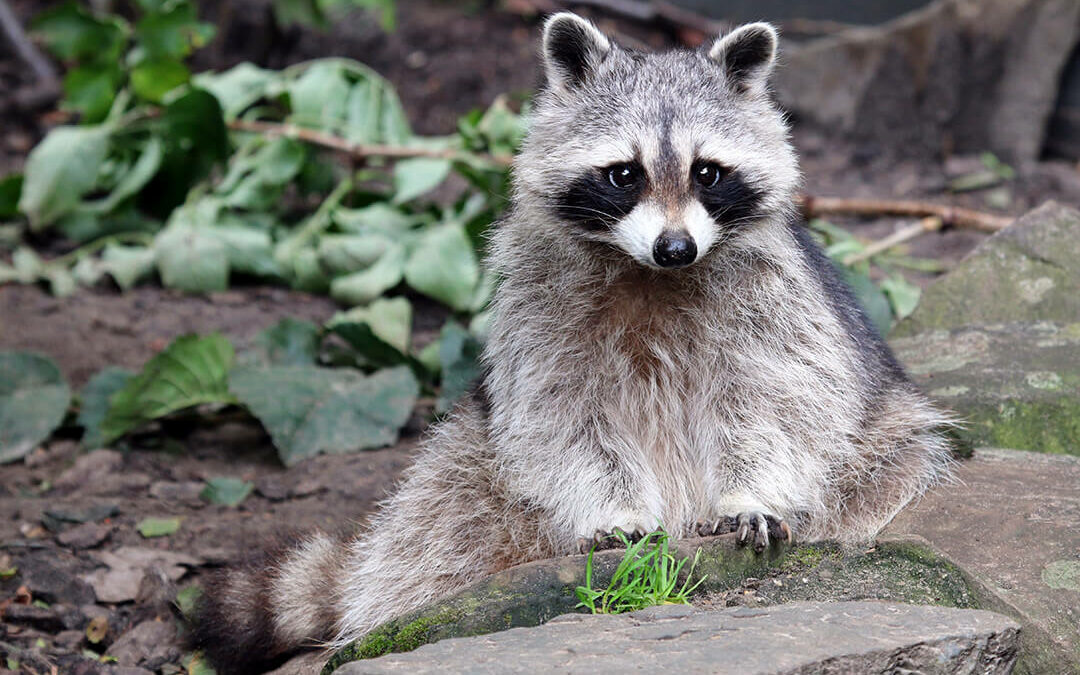
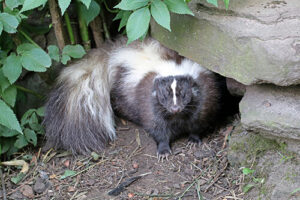 Keeping rodent pests like raccoons and skunks out of your backyard can sometimes be a difficult task, but with the right landscaping strategies you can discourage them from visiting. Strategies include lawn maintenance, careful selection of plants, trees, and shrubs, and adding hardscaping to block or discourage entry into your outdoor space. Read on for more details.
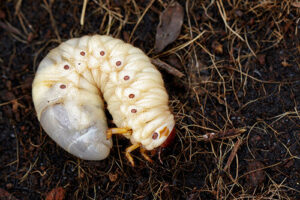 An unhealthy lawn’s root system is a breeding ground for weeds that unwelcome pests may feed on. And your lawn’s poor health may be an indication of an excess number of parasites (like grubs) that skunks and raccoons also find delectable. If your lawn has seen better days, don’t despair. Foundational
  Reduce or eliminate food sources that may be attracting unwanted wildlife to your property. This includes pet food dishes, bird feeders, fruit bearing trees and shrubs, and unsecured garbage cans. Rabbits and mice like to feed on the bark of younger shrubs and trees. To prevent this, install a guard or fabric around the trunks of younger shrubs/trees during the winter months to prevent this from happening.