by A Touch of Dutch Landscaping | Nov 22, 2018 | Foliage, Lawn care, Maintenance, Shrubs, Trees
In Southwestern Ontario, we’re generally finishing up putting our lawns and gardens to bed for the winter. While some do very little but cut back spent seed heads and dead foliage, others employ measures to cover and protect every tree, shrub, and plant on their property. An approach that falls somewhere in between is generally best to avoid plant and tree loss and ensure a healthy start the following spring. Here are some guidelines to help you ensure you’re adequately protecting your lawn and garden in the winter.
LAWN
Getting your lawn winter-ready takes very little effort. In fact, you may already be doing most of the items on this short checklist already.
Keep it short
Grass generally stops growing after day time highs remain below 10°C. Your final cut of the season should be between two and two and a half inches. Grass that’s too long may fall over through the winter, encouraging fungal growth. Grass that’s too short leaves it susceptible to stress due to the cold.
Keep it clean
Remove all furniture, toys, and debris (including any notable accumulation of leaves) from your lawn to avoid damage that results in bare patches come springtime.
Minimize traffic during transition
Dormant grass that doesn’t yet have a good layer of snow on it yet can be damaged quite easily when walked on. Try to stay off of grass during this transition.
Keep it insulated
A blanket of snow serves to insulate your lawn during the winter. Once the snow flies and starts to accumulate, keep your lawn blanketed all winter long.
PLANTS, TREES, AND SHRUBS
There are a few factors that determine your need to protect plants, trees, and shrubs during the winter:
Exposure to the elements
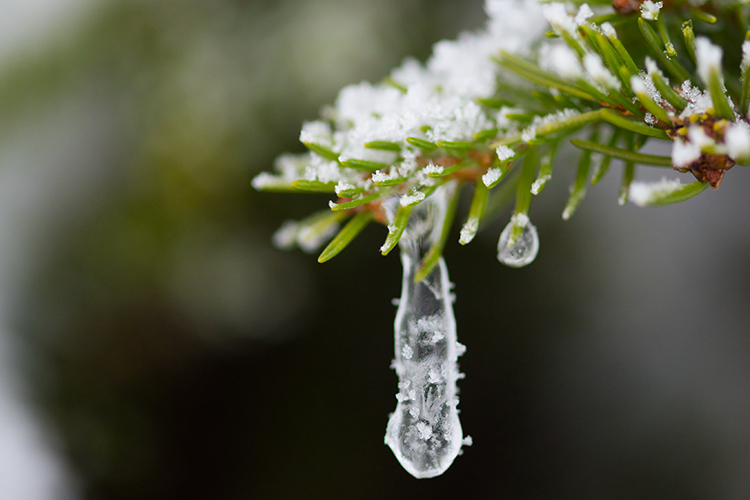
If a location is exposed to excess wind, snow melt, and/or ice, the vegetation in that area may break or even die before or by the time spring arrives. In addition, if relatively horizontal limbs are suddenly laden with heavy snow or ice, they might bend or even break as a result.
Exposure to road salt
Trees and shrubs that are close to roadways or are in the line of fire when snow is being displaced from roads, driveways, and walkways,
Your plant hardiness zone
Our region (Stratford and surrounding area) is generally classed as hardiness zone 5, so your garden should consist of plants and trees that thrive in this zone. If you’ve tried to push the limit with some of your selections (vegetation that’s appropriate for warmer hardiness zones), you’ll need to take special care to prepare them for winter in Southwestern Ontario.
How well-established the plants in question are
Well-established plants and trees have strong root systems that help sustain them through the cold winter months. On the other hand, those that have been newly planted or moved, particularly after the beginning of September, have not had sufficient opportunity to get established and so will require protection this winter.
HOW TO PROTECT YOUR PLANTS, SHRUBS, AND TREES
If your plants do need to be protected, there are three primary methods used, depending on the plants in questions and what you’re needing protection from.
Wrapping
Wrapping with burlap and twine can protect shrubs from salt spray, drying winds, and/or heavy snow and ice. You might opt to protect younger evergreens and shrubs from frost and heavy snow with a teepee instead, which can be made out of burlap and wood stakes or plywood.
Mulching
A 4 to 6-inch layer of mulch on vulnerable or newly established plants will protect them from the effects of repeated freezing and thawing which can plague our region this time of year.
Mounding
This is simply the act of piling soil up around the base of a plant, and is a great way to protect plants and bushes that are cut back at the end of every season. Mounding is commonly done with rose bushes and hydrangeas, as it protects them from exposure to prolonged cold, ensuring a healthy plant, come spring time.
If you haven’t taken measures to protect your garden yet, an early layer of snow may have you feeling like you’ve missed the boat. However, most vulnerable plants will still benefit greatly from protection, so it’s not too late. Regardless of how long winter is, you can still use the tips above to avoid plant loss and help guarantee a beautiful start to next year’s growing season.

by A Touch of Dutch Landscaping | Sep 20, 2018 | Irrigation, Lawn care
When we reach September, we tend to start thinking about putting our lawn and gardens to bed for the winter season. However, the onset of cooler nights with sunny, warm days is the perfect combination for establishing a healthy lawn. The absence of extreme heat means less demand for watering and minimal risk for seed dryout, and the overall cooler temperatures help keep weeds at bay.
Whether sodding or seeding, take advantage of late summer conditions to create a foundation of strong roots before the frost and snow set in. Here are the ins and outs of both sodding and seeding:
SOD
If you’re looking to get your lawn installed fast, then sod is your answer. Not only is installation quick, but the wait time before it’s ready to use is generally only three to four weeks.
Plus, you can cover a range of surface sizes, so while sod can handily cover a small yard, it really shines when you start with a large surface area and convert it to a lush green lawn in just a day or two.
But there are a couple caveats here. First, sodding can be labour-intensive as it requires a bit of prep and some heavy lifting during installation, so you want to make sure you have enough hands on deck to successfully complete the project.
Also, sod is considerably more expensive than seed (about 5x more expensive for the materials). So, if your priority is getting to a finished lawn quickly, sod is your answer. However, if keeping costs down is a factor, then you might opt to apply seed instead.
SEED
Starting a lawn from seed actually has a number of advantages. First and foremost, it’s a more natural process than sodding because the grass begins its life in the soil where it will live. With moderate watering, the seed germinates and takes root, ultimately creating a lush, native lawn.
Seed is pretty approachable for the average homeowner as it’s relatively easy to apply, and the tools and materials needed for the job can be found at most garden centres and home improvement stores.
Of course, the aspect of seeding that makes it a popular choice with homeowners is the price. Seeding costs only about a fifth of sodding your yard, making it a seemingly obvious choice.
However, there is a drawback of seed and that is time. From start to finish (a lawn that’s ready to be walked on), a seeding project takes considerably more time than sodding. Depending on amount of sunlight, variety(s) of grass, watering, air temperature, nutrients and grading, a seeded lawn can take up to one year to be completely ready to go, so patience is a requirement.
GENERAL NOTES:
- Choose good quality sod or seed.
- Sod should be deep green and the accompanying roots should be moist. Laying down dry sod will result in less than ideal results, and will require a lot more watering.
- There are a lot of different varieties and combinations of grass seed available depending on if you are seeding a shaded area, full sun area or simply over-seeding.
- The ideal conditions for establishing a lawn are as follows:
- Level or gently-sloping ground with no significant low areas where water would puddle,
- Adequate water supply, either from rain and/or a sprinkler or irrigation system,
- At least six hours of sunlight each day for sod; seed varieties can be adapted for areas that receive less sun,
- Little or no walking on it, until it is established,
- Moderate air temperature – not too hot or too cold (high teens, low twenties),
- Well aerated soil with lots of nutrients and good drainage; moderate pH is good but if it’s a bit acidic, that will work well, too.
PROFESSIONAL CARE
If you want a lawn established quickly and properly (and done right the first time) there’s no substitute for professional workmanship. We have a lot of experience creating and maintaining lawns. If you’d like your lawn areas to be prepared and either sodded or seeded correctly, contact us at A Touch of Dutch Landscaping about our sodding and seeding services. We guarantee our work.

by A Touch of Dutch Landscaping | Jul 21, 2018 | Irrigation, Lawn care
Landscaping design companies like us install and maintain a lot of grass every season. We sod, we seed, we cut, we weed. New lawns look great – green, lush, and weed-free. But often, maintaining a healthy lawn can be trying, and one of the biggest challenges is typically adequate watering.
With heightened environmental awareness these days, homeowners tend not to be heavy-handed with watering, but many overestimate the amount of water it actually takes to keep your lawn green. Below, we’ll break down watering needs for new sod, seeded yards, and established lawns.
New Sod
For best results, water each area daily for 1 ½ – 2 hours. The second week, reduce watering to every other day, for the same length of time.
Note: Do not cut sod for at least 2 weeks after it is installed. When you first cut it, raise blade to highest position. Wait at least 3 days to cut again, this time with the blade in second-highest position. This will ensure the vaccum-like suction of the lawn mower doesn’t lift the sod before it is fully established. After another 4 days you can cut using your usual blade position.
New Seed
A newly seeded lawn requires brief watering – only 15 minutes per area – twice daily until seed has germinated. The goal is to keep the soil moist but not oversaturated, so avoid having run-off or standing water. Once seed has germinated, reduce watering to every other day, for the same length of time. If at any point, you get rainfall while seed is getting established, you can forego watering for the day and resume next day.
Note: Wait until the grass is at least four (4) inches high before cutting for the first time. Raise blade to highest position for the first cut. Wait at least 3 days to cut again, this time with the blade in second-highest position. This will ensure the vaccum-like suction of the lawn mower doesn’t lift the seed before it is fully established. After another 4 days you can cut using your usual blade position.
Established Lawn – Ongoing Watering
If you’re going to water, water regularly. If not, let your grass go dormant. Anywhere in between is not healthy for your grass as irregular watering can put stress on your lawn’s root system.
Water in the morning. The air is generally cooler and the water has just enough time to soak into the ground before the day heats up. Afternoon watering leads to evaporation, which means the water doesn’t get where it’s supposed to go, and watering in the evening generally can make grass more susceptible to fungus growth as the water sits on the blades of grass for too long.
Water just long enough for the water to soak about 2 inches (5 cm) into the ground. This will take about 2 hours of watering per area. If you do that twice a week during dry spells you should be able to keep your lawn green and healthy, while avoiding overwatering.
Many people set up a sprinkler, intending to move it or turn it off after 10 or 15 minutes, but then get preoccupied with something else, resulting in overwatering. Consider using a hose timer to avoid over-watering. A decent one will only set you back $15-$40 and can be found at most hardware stores and major gardening centres.
Following these guidelines will help you maintain a healthy, green lawn from Spring to Fall. Of course, if you have any questions, we’re just a phone call away.


